There are two ways to add Files. Both are detailed below.
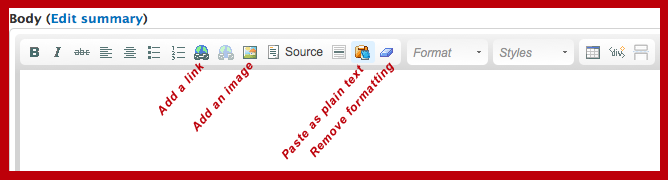
Your rich text editor toolbar may look slightly different than the one illustrated above.
Remember to log in to your site, navigate to the page you want to edit, and click the Edit link to start editing.
All images and files (PDF, Word documents, Powerpoint) need to be uploaded to the web server to be made available for internet viewing or download.
For files, usually the following files are allowed to be uploaded: .txt, .doc, .docx, .xls, .xlsx, .ppt, .pptx, and .pdf.
1. UPLOAD AND LINK TO FILES - If there is no "File field" attached to the page.
- Scroll down to the body content field. It looks like a text editor window.
- To make a file usable on the web it first has to be uploaded to the server.
- Highlight the text that you want to be the link to the file.
- Click the Add a Link button
- When you click on the Link button a window will pop up.
- In that window you will see a button that says Browse Server.
- Click that.
- Yet another window will open. It is here where you will upload the file.
- Click the Upload link in the upper left corner.
- Browse to the file on your computer and upload it.
- You will then see the file in the main window in the right column.
- Be sure that file is highlighted then click the Insert File link in the upper left.
- Click OK
- The text should now be linked to the file.
- Save the page (scroll down to the very bottom and click Save).
2. UPLOAD AND LINK TO FILES - from a "File" field.
If the page you are editing has a field for files, this can make it easier and more convenient to insert files into the body of the node. While in Edit mode, scroll down below the Body field and look for a file labeled "File" or "Files" or "Attached Files" or "Additional Files" or something like that. Below the field label it will say "Add a new file." If your page does not have a file field, use the procedure above.
If your page does have a file field:
- Scroll down to the file field. It will say "Add a new file" just below the field label.
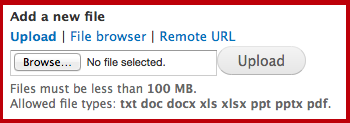
- Click "Browse" and navigate to the file you want to upload and link to. Select that file.
- Click "Upload."
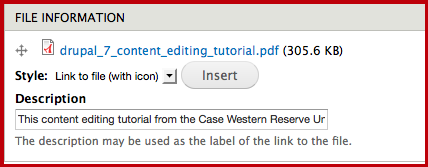
- Now you should be presented with a "Description" field. This is for the text that you want to link to the file. Example: "Event flyer" (where the filename is e.g., flyer.pdf). Enter the text you want to contain the link to the file.
- Now, scroll back up to the Body field, and position your cursor where you want the file link to appear.
- Back down at the File field, click the Insert button. This will insert a link to the file you uploaded, using the link text you put in the Description field, along with a small icon to indicate which file type it is.
- Save the page (scroll down to the very bottom and click Save).